
Controlling a Servo Motor with Arduino: SG90 and MG996R
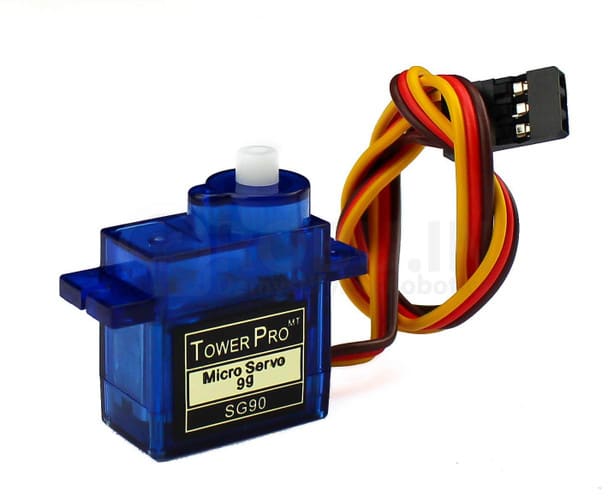
A servo is a motor that goes to an angle and holds it. You tell it 90 degrees and it turns to 90 degrees and stays there, resisting being pushed. That makes it the right choice for a robot arm joint, a steering linkage, a gripper or a gate, and the wrong choice for a wheel, which needs continuous rotation instead.
Wiring
A servo has three wires. Brown or black is ground, red is power, and orange or yellow is the signal wire that goes to an Arduino digital pin. The sketch below uses pin 9.
Power is where most first attempts fail
Do not power a servo from the Arduino 5V pin. This is the single most common mistake with servos and it produces symptoms that look like a software bug: the board resets randomly, the servo jitters, or your serial output turns to nonsense in the middle of a movement.
The reason is current. An SG90 draws a few hundred milliamps while moving and considerably more at the moment it stalls against an obstruction. The Arduino's onboard regulator cannot supply that, so the whole board's voltage dips and the microcontroller resets. A larger metal-gear servo such as the MG996R draws well over an amp when stalled and has no chance of running from the board.
Use a separate supply for the servo: 5V to 6V from a battery pack or a mains adapter rated for at least 1A, more if the servo is large or there are several of them. Then connect the ground of that supply to the Arduino ground. They must share a ground or the signal wire has no reference and the servo will behave erratically.
Choosing between SG90 and MG996R
The SG90 is small, plastic-geared and light. It is ideal for learning, for light linkages, and for anything where the load is small. Plastic gears strip if you jam it.
The MG996R has metal gears and considerably more torque, which is what you want for a robot arm that actually lifts something or a steering mechanism that fights against friction. It is heavier, draws far more current, and demands a proper supply.
Moving smoothly
Writing an angle makes the servo travel there as fast as it can, which is jerky and draws a current spike. If you want a smooth movement, step through the intermediate angles with a short delay between them, as the sweep function in the sketch does. It also puts much less strain on the gears.
Finally, remember that most hobby servos only cover about 180 degrees. Commanding an angle outside their range makes them push against their internal end stop, which draws current continuously and eventually strips the gears.
// Servo control with smooth movement.
// Library: Servo (bundled with the Arduino IDE).
#include <Servo.h>

Servo myServo;
const int SERVO_PIN = 9;

void setup() {
  myServo.attach(SERVO_PIN);
  myServo.write(90);          // start centred
  delay(500);
}

// Step between angles instead of jumping, to reduce jerk and current spikes.
void sweepTo(int from, int to, int stepDelayMs) {
  if (from < to) {
    for (int a = from; a <= to; a++) { myServo.write(a); delay(stepDelayMs); }
  } else {
    for (int a = from; a >= to; a--) { myServo.write(a); delay(stepDelayMs); }
  }
}

void loop() {
  sweepTo(90, 180, 15);
  delay(400);
  sweepTo(180, 0, 15);
  delay(400);
  sweepTo(0, 90, 15);
  delay(400);
}Browse our full catalog of Arduino boards, sensors and components.
Reviews
Be the first to review this guide.
More tutorials
 Beginner
 An honest comparison of the two most common boards, and a clear rule for choosing between them.
 Beginner
 The classic first Arduino project — blink an LED on and off.
 Intermediate
 Project ideas grouped by difficulty, with the parts each one needs and an honest note on where students usually get stuck.