
DHT11 and DHT22: Reading Temperature and Humidity with Arduino
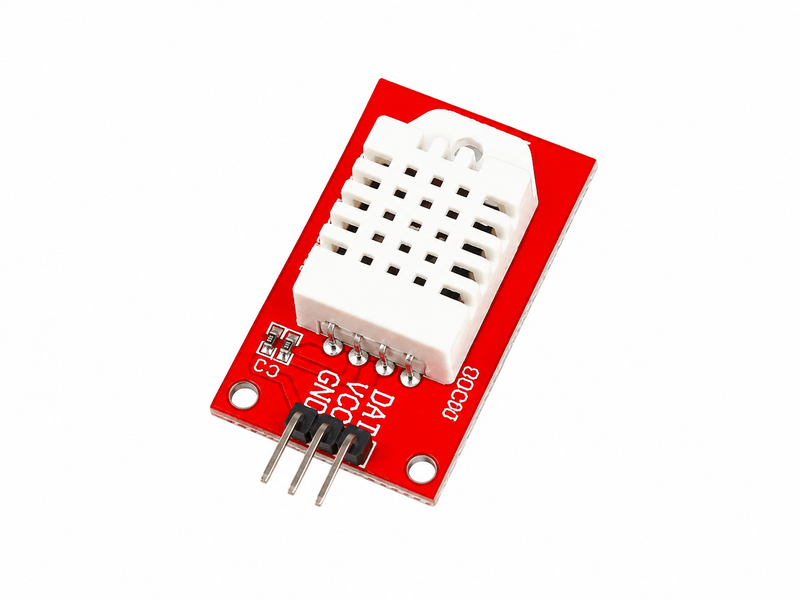
The DHT11 and DHT22 both measure temperature and humidity and both talk to your Arduino over a single data wire. They are not interchangeable in quality, and choosing the wrong one wastes either money or accuracy.
Which one should you buy?
The DHT11 reads temperature from 0 to 50C to within about 2 degrees, and humidity from 20 to 80 percent to within about 5 percent. It updates once per second. For a room monitor or a school project that is completely adequate, and it is the cheaper part.
The DHT22 reads temperature from -40 to 80C to within about 0.5 degrees, and humidity from 0 to 100 percent to within about 2 percent. It updates once every two seconds, so it is slower, but every reading is worth more.
The honest rule: if the number is going to be displayed and forgotten, use a DHT11. If anything is going to be decided based on it, such as switching a fan or a heater, pay for the DHT22.
Wiring
Both parts use the same three connections. VCC to 5V, GND to GND, and the data pin to any digital pin. The sketch below uses pin 2.
If you have a bare sensor rather than a module on a small breakout board, you also need a pull-up resistor of about 10k ohms between the data pin and VCC. Most modules sold today already have that resistor fitted, which is why module versions tend to just work.
Handling failed readings
Every DHT sensor occasionally returns nothing. The protocol is timing sensitive and if an interrupt fires at the wrong moment the read is corrupted. This is normal and not a sign of a faulty part.
Your code must therefore check for a failed reading every single time, which is what the isnan check does in the sketch below. Beginners frequently skip that check, then find their display flashing meaningless values.
Do not read faster than the sensor supports. Polling a DHT11 more than once a second, or a DHT22 more than once every two seconds, does not give you fresher data, it just returns the last stored value or fails outright.
Library
Install the DHT sensor library by Adafruit through the Arduino IDE Library Manager. It also asks for the Adafruit Unified Sensor library, which you should accept.
A practical project
Combine this with a relay module and you have a thermostat: read the temperature, and if it rises above a threshold, close the relay to switch on a fan. Add a small OLED display and it becomes a standalone weather station you can leave on a shelf.
// DHT11 / DHT22 temperature and humidity.
// Library: "DHT sensor library" by Adafruit.
#include <DHT.h>

#define DHT_PIN  2
#define DHT_TYPE DHT11   // change to DHT22 if that is the part you have

DHT dht(DHT_PIN, DHT_TYPE);

void setup() {
  Serial.begin(9600);
  dht.begin();
}

void loop() {
  // DHT11 supports 1 reading/sec, DHT22 one every 2 sec. Do not go faster.
  delay(2000);

  float humidity = dht.readHumidity();
  float tempC    = dht.readTemperature();

  // Every DHT fails a read occasionally. Always check.
  if (isnan(humidity) || isnan(tempC)) {
    Serial.println("read failed, retrying");
    return;
  }

  Serial.print("Temp: ");
  Serial.print(tempC, 1);
  Serial.print(" C   Humidity: ");
  Serial.print(humidity, 1);
  Serial.println(" %");
}Browse our full catalog of Arduino boards, sensors and components.
Reviews
Be the first to review this guide.
More tutorials
 Beginner
 An honest comparison of the two most common boards, and a clear rule for choosing between them.
 Beginner
 The classic first Arduino project — blink an LED on and off.
 Beginner
 Move a servo to an exact angle, and understand why powering it from the Arduino is the mistake that breaks most first attempts.